De-Energized!
Wow, cannot believe it has been 6 weeks since I last posted. Sorry folks – been busy, but also running on fumes in the energy department and just not up to ‘computer work’ in the evenings. I was hoping to share some great news in this update, but sadly the world has had yet another twist for me. But first, lets get caught up and what has been completed since last update.
During the balance of February, I worked on finishing all of the fascias and then installed backer rod on the majority of windows – part of process of air and water sealing around the windows (as this rod is installed from the outside, I did the upper floor windows while I still had the lift on site).
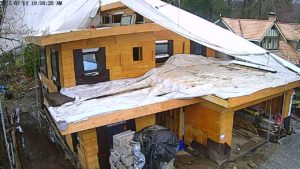
Transitioning into March, I switched gears and started prepping for the installation of the permanent electrical service. This involved having a 25′ power pole installed and getting ready to move the shipping container so I could finish the trench containing the tech cable that runs from the main panel in the basement out to the the power pole I am installing near the side property line.
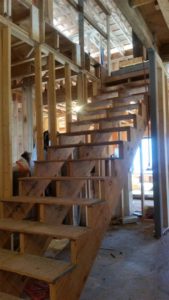
I also ordered and received the stringers for the main floor stairs to the second floor and installed them during the second week of March. Currently they are installed with just 3/4″ plywood ‘work’ treads. I still have 3/4″ plywood risers to install and 2×6 stiffening planks that will run parallel to the bottoms of the stringers and are glued and screwed to the each stringer. The final step will be to add the hardwood 1-1/8″ treads and 1/2″ risers during the finishing stages of the house. It is VERY nice to finally have stairs and not be climbing ladders every day. Would have been nice to have them installed long ago, but we just recently decided on the hardwood flooring we will use for both the floors and stairs and the flooring thickness effects the rise and run of the stringers (especially when stair hardwood is different thickness than main floors like ours) .
But back to electrical, I am utilizing a customer owned pole to mount the meter on because I do not have a good place to put the meter on the house where 1) it would not be visible from the road and 2) it would not be bumped into when walking down the sidewalks at the side of the house. This also lets you put the main panel more central in the home resulting in shorter runs for many of the circuits include the high amperage kitchen circuits. You just have to make sure to check with your inspector on how much conductor can be routed inside the dwelling (as this is line voltage with no safeties in place). For North Vancouver, they generally allow 5′ which is less than I will have with the cable coming from below the basement floor slab right into the base of the main panel. The final benefit to not installing the meter or main panel on an exterior wall, is that you do not have the considerable interruption to your exterior wall insulation plane.
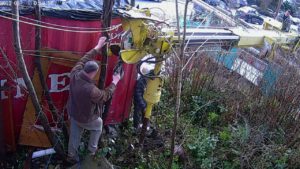
In order to move the shipping container, I had to first prep a new area in front of the house. As this area in adjacent to what will be our permanent driveway, I also had to prep the ‘gravel cistern’ that I plan to have all roof storm water flow into before going to the municipal storm sewer. I would pipe the roof drains to a sump that flowed into the 2′-3′ depth of crushed recycle concrete that will be under our new driveway. For most lighter rains, the water will just build up in this pit and dissipate into the ground over time. For heavier rains, the water level would build up until it reached a higher discharge in the sump where it would then gravity feed into the municipal storm.
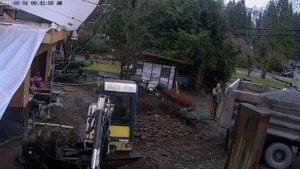
With all the prep done, I called HYDRO to cut off my temporary power supply (which ran over top of the container), and setup the crane to lift the container over. Fortunately the crane succeeded although it was touch and go. The container itself is 5000 lbs empty and I guesstimated I had 1000 lbs in construction supplies inside. If I had looked inside and done a detailed estimate I would have seen this was optimistic. The crane operator figures I had at least 5000 lbs inside and the lift was at the absolute limit of his crane (we had to drag the container for the first 6′-8′).
With the container moved and all of the site’s network and webcams reconnected (using power I am now borrowing from both neighbours), I moved onto digging the trench to bury the remainder of the teck cable with the tractor. I had installed most of this cable in Spring of 2015 in a trench in the bottom of the excavation before laying out the footings. The cable then travelled up the outside of the foundation walls before transitioning to a horizontal trench at finished grade. Only a portion of this at grade trench could be completed during foundation backfill operations last year due to the location of the shipping container. The remainder of the cable was coiled up and protected from damage until the current operations.
With the trench completed and cable laid, I also installed the meter base and service conductors with service head on the newly installed pole. I then started the final step of connecting the teck cable to the meter base, and this is where everything went south. But lets back up a few steps fist.
As mentioned the majority of the teck cable was laid during the spring of 2015. I had not had the cable ‘inspected’ at that time and instead received approval from the municipal inspector verbally based on photos I had emailed showing the 3″ sand base below and above the cable. Fast forward to last week when another of the municipal inspectors dropped by to discuss my ‘temporary’ mounting of the main panel in the basement. As the basement slab is not yet poured, I do not have partition walls framed down there. So I do not have anyplace to permanently mount the panel to. Instead I have mounted it to 3/4″ plywood (which is best practice anyway) and have mounted that plywood to temporary bracing that places the assembly in the exact location of its final mounting between two studs once the walls are up. During this visit, the inspector commented that the copper conductors looked ‘small’. I advised what they should be (without looking at the jacket) and he looked it up and said it was OK and it was probably just that they are not used to seeing copper (most people install Aluminum conductors for service because of the cost savings).
Fast forward a week and I am prepping the teck for final connection to the meter base. The conductors were supposed to be close to the same size as the #3/0 Copper conductors running from the meter base up to the service head (close because the code requirements have changed a bit over the last year). As I was stripping the insulation off the conductors and attaching to the lugs in the mater base, it was clear something was wrong. The teck conductors were about half the size of the newly installed conductors running up the pole.
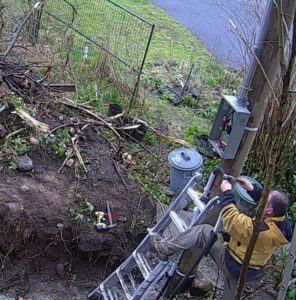
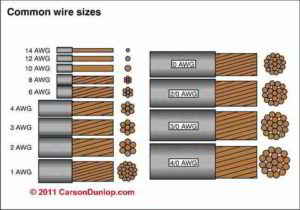
At this point I started to feel sick and panicked. I reviewed the wiring code from last year and I was supposed to have a #2/0 three conductor copper teck cable for my 200A service (based on last years code). And I know that this is what I verbally ordered because I remember the conversation with the vendors. I was reading from the code book when talking to the vendors and stated I needed a 200 amp service and with a #2 ‘slash zero’ copper conductor. Back then I did not know to call it a #2 ‘ott’. I had settled with a supplier that was a distributor and quite a bit cheaper than the wholesalers. Looking back at the invoice and then the jacket on the cable I found out why. Instead of a #2/0, I had been sold a #2 which only has a capacity of 125A. And of course my lack of experience did not flag me as to the physical size of the cable when I picked it up 2 years ago.
Now I really felt sick and kind of walked around in a daze for the next 30 minutes or so not really believing what was happening. I kept rechecking the cable jacket, invoice, and code books hoping for a different outcome. Coming to terms that the cable was wrong, I then started to really freak out as to what could be done about it.
Was I going to have to re-excavate down to the bottom of the foundation at the front of the house? Was I going to be forced to abandon the remote power pole and have to put a meter and adjacent panel somewhere on the exterior wall of the house?
I called it a day and moped home where I had a VERY POOR evening and night. But I started to formulate a plan and met with the electrical inspector the next morning to get the plan approved. I would need to extend the current trench all the way back to the house at a depth of 3′. From there, I would run the new cable through the foundation wall and down the interior of the foundation wall to below the level of the to-be-poured floor slab. From here, it would be easy to retrench through the drainage gravel to the location of the main panel.
The only complication with this plan, is you are only allowed that 5′ of unprotected cable inside the dwelling. Fortunately the code has an answer for this, encase the cable with concrete providing at least 2″ of concrete cover all around the cable. I will need to form up a vertical concrete column that protects the cable as it runs down the inside of the foundation wall.
So now at least I have a plan and it will not be TOO expensive. I have not yet priced out the new teck cable but will switch to Al conductors to save money. I will use ether a #4/0 or 250MCM (which is bigger than #4/0 but more common and therefore may be cheaper). I have labour coming tomorrow to move leftover Durisol ICF blocks from front of house where I need to trench with the tractor, and then will have them dig the trenches through the basement by hand. I have already asked my engineer to provide instructions for tying in the new concrete column with the existing foundation. I will also hire a company to core through the foundation and will have them also do the two cores needed for the main sani-sewer line leaving the house while on site. All in all, I hope to be ready for inspection by next Monday at the latest (but much of this will depend on when coring company can get here).
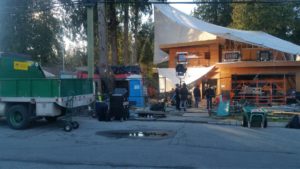
The final update involves some excitement at the house. One Wednesday morning, a film location scout came by and frantically explained that they were filling a commercial for a American breakfast product that following Friday and that one of the venues had pulled out that Wednesday morning. They needed a construction site and were wondering if I was interested. They would need the house for a ‘few’ hours and would put everything back the way they found it. The location fee would cover my month long lift rental and then some, so I advised I was all in. They showed up on Friday morning and started setting up while I continued working on the fascias. After a late lunch, that I also was also invited too, they filmed the commercial aver about 1.5 hours and were packed up and on the road by 4:00 PM. So the house will forever be famous 🙂
Thanks for visiting.
“There is no chance, no destiny, no fate, that can hinder or control the firm resolve of a determined soul.” —Ella Wheeler Wilcox (1850-1919) Poet
“There are no shortcuts to any place worth going.” —Beverly Sills (1929-2007) Opera Soprano
“The person who makes a success of living is the one who sees his goal steadily and aims for it unswervingly. That is dedication. ” —Cecil B. DeMille (1881-1959) Filmmaker

Your determination is very commendable! Problem solving skills are exemplary!! The use of your house for a commercial – you used as a creative benefit.
Congrats once again.
Carolyn