First Second Floor Wall Complete
It is hard to believe it has only been a week since my last update. It seems like forever ago for me. Time at site on construction was 30 hours, which is often a normal week for me, except I was only on site for only 2 full days and 2 half days. But design time in office and meeting with my roofing consultant has eaten up an additional 45 hours over the last week.
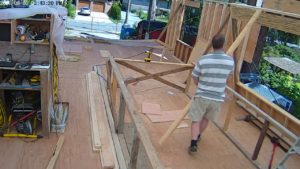
Over the weekend and stat, I moved my workbench and computer station to the upper deck, verified the deck measurements against my AutoCAD model, and determined the exact location where my clerestory beam will sit and marked this on the deck. This will be the critical line I will measure everything else off of, as its location is not optional. I will have trusses tying into the beam on the south side and the north trusses will be locked into the wall creating the clerestory placed above the beam.
The first of my material arrived on Tuesday AM (after our Monday Stat). True to form, I did not allow enough time for some items (Smaller engineered lintels and columns), and the remainder arrived on Friday AM. Fortunately, I did not need them this time and went ahead and framed the south wall of the second floor (leaving out a missing lintel for one of the two windows).

I gave myself a break this time and split the wall into two, at a built-up column location, so that I did not end up with any extra sticks (and the resulting thermal bridge). I did not have the room for a continuous wall on the floor deck and was more nervous about what would happen if the lifting of the wall went ‘south’ (literally falling of the south end of the house). The wall construction and lifting went smoothly.
The focus this week has been the roof assembly. I am behind ordering my roof truss packaged (by about 2 weeks). During my initial work on the package, I reviewed the Best Practices guide from RCABC.org and realized that my south upper roof, and my garage and office lower roof did not meet their slope requirements for a metal roof (regardless of how high the standing seams were).
This caught me by surprise, as it had not been mentioned during conversations with various design people I had previously consulted with. I knew I had to switch from a Standing Seam Metal roof to a 2-Ply Torched on SBS Membrane Roof. I had originally stayed away from this style of roof because my lower roofs slope towards the road, and well quite frankly, torch on roofs are ugly. But in my early design stages, I did not think of making the roof ‘flat’, so that its surface could be hidden by a tall fascia.
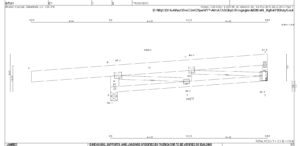
This is what I will now do, and I have spent most of the week in AutoCAD designing and drawing up the new roofing system for both levels. This does not effect any of the structural aspects of the roof, but does change some of the truss dimensions and layout. I have also updated the model to account for the variance in as-built framing over what was originally planned. To confirm the design concept, I reached out to the former Technical Manager at RCABC, Rob Harris, who is a wealth of information, and the person I would call on when I had a roofing question while practising home inspections. I am very appreciative of his time, and will hire him to write up the installation specs for the roofing, and inspect the job during application. I hope to get a Red Seal roofer (Cory who did my basement waterproofing) to install the membrane, if he is not to busy dealing with all of the work that RDH has him doing.
The new fascia design will also solve my gutter issue (I did not want to see them and was planning on some form of secondary fascia to hide their presence), as it will allow the installation of a hidden gutter system. Now, I normally am a proponent against hidden gutters, but that is because most are fabricated with EPDM membranes and matched up to shakes or shingles. I have NEVER seen one of these without defects during my inspection career (typically the installer has not used the right process to seam the material). But a torched-on membrane integral with the rest of the roof should be a flood-proof system.
Fortunately, the roof design changes does not negatively impact any of the framing already completed. But my deck dimension verification does show that my south wall is about 1.5″ out of square to the clerestory beam, so I need to work with the truss manufacturer (Alliance Truss), to see if I can order the heels widths a bit narrower too make up for this variation.

In general, I have to admit that keeping things on track from a dimension point of view is challenging me. Part of it is that I expect them to be right on (to the nearest say 1/8″) and this is a very difficult tolerance to maintain. Part of it also is that I am not good with numbers. They do not ‘mean’ anything to me and I find that they are not easily retained in my head. So I write EVERYTHING down. But at times I still will miss read a number or write down the wrong number. It has been quite frustrating really, but I am developing methods to check as I go, that are not too cumbersome.

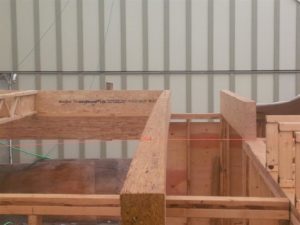
The other part that makes keeping things true difficult, is the high variation in lumber and even engineered products. I am finding a lot of the engineered beams have quite a bow to them, which can present quite a challenge when they are 3.5″ x 11-7/8″ and 22′ long.
But really what has made the most impact on my project is that the foundation, although almost perfectly level, was out of square at several corners, and because my walls sit on top of stubs at the top of the foundation, and not on a floor deck, correcting for out of square has been difficult if not impossible. Now most people will never notice 1.5 inches over 40 ft, but it does add some complexity when framing roof trusses that lock into a wall at both ends.
Tomorrow I will pick up the 2 storey hollow structural steel column and attempt to thread it through the existing framing into the centre of the house and install it. I will then start working on the upper floor walls again, after a quick call to the truss supplier to confirm we are square away and can start manufacture of the package.
Thanks for visiting.
“Opportunity is missed by most people because it is dressed in overalls and looks like work. ” —Thomas Edison (1847-1931) Inventor, Businessman
“The sign of a beautiful person is that they always see beauty in others.” — Omar Suleiman (1936-2012) Former Vice President Of Egypt

Gee, this is a lot more challenging than building a COOT..!!!
Might just be, certainly is taking me as long. I have over 4000 hours into the post design process to date. Probably another 3000 hours prior for the design phase.