Progress Continued
I continue to make reasonable progress and am now 100% ready for the roof truss delivery on the 23rd of this month.
Progress over Last Two Weeks:
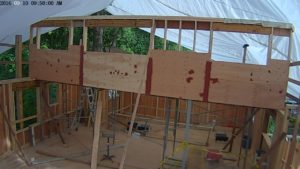
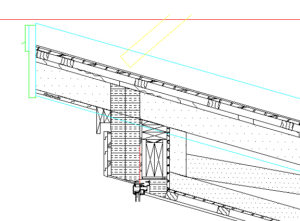
- I finished the roof design and then the design of the clerestory wall to roof interface. This allowed the wall to be framed and lifted into place. I also sheathed the bottom of the wall, on the outboard side, in the region where the south roof trusses will attach. I also sheathed the inboard side of the wall at the top where the wall will be covered by the top chord bearing North roof truss. All plywood seams in these regions were then air sealed as I will not be able to do so once the trusses are in place. I will finish sheathing the wall after the roof is on, as I will then have an easy place to stand and work from.
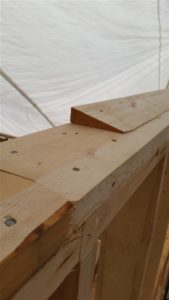
- I completed all of the double top plates for the second floor and garage. A few locations have 3 top plates. The south end of the top floor was framed using 8′ 2×4’s instead of the 92.25″ studs to save the waste of cutting down the longer member. But this left me 1.25″ shy of my ultimate ceiling height goal. The addition of an additional planed down top plate ekes out another inch and a bit of ceiling height. I will still end up with normal drywall sheet sizes, as my ceiling is dropped with a services raceway and hydronic heating panels. For the garage North wall, I again used standard 9′ Studs (104.25″) instead of cutting down 10′ boards which left me 1.25″ shy again of my target height. So I just planed down a 2×4 and Bob was your uncle!
- I met with my roof truss vendor and hashed out the truss design details and dimensions. This took a lot of time and effort pre and post meeting, and I am glad it is over and resolved. The trusses will arrive on the 23rd of September.While on the subject, did you know that all truss drawings are in FIS dimensions? This threw me for quite a loop at first before I was able to get an interpretation. F.I.S stands for Feet – Inches – Sixteenths. So a dimension like 6-8-14 is interpreted as 6′ + 8″ +14/16″ or 6′ 8-7/8″.
- I have sent out my RFQ for a possible 2 kW PV panel array for the south roof (I am hoping this will cover all of my heating, cooling, and domestic hot water loads) and have had some preliminary discussions with one vendor.
- I have ordered my sanitary sump pump barrel for the basement (has to come from Liberty Pumps in New York). The pump and lid were salvaged in like-new condition from a home being torn down in West Vancouver about three years ago.
- I have trued up all of my window and door openings and confirmed sizes and will release the order to Cascadia Windows and Doors in next few days after I confirm details for clerestory windows. They will take 6-8 weeks to manufacture which should be just about perfect for getting the roof decked and waterproofed.
- I continued to work with my roofing consultant – Rob Harris, to flesh out design for the hidden gutter system and the required curbs for the PV Panel mounting in the roof. I will have a large 2×16 Fascia that will extend 5″-8″ above the roof deck surface. This will create the pocket needed to create the hidden gutter system. You need the added pocket height to allow the 2% sloped crickets to be installed that lead the water along the base of the roof towards the centralized drains leading to the downspouts.
- As of this evening, I have finished the currently posted portions of my Hydronic Heating Course (26 segments). Course does not officially start until the 19th, but I wanted to get as much of this behind me, during my current relatively light work schedule, as possible.
- I wrote a technical primer, which I posted on my Sustainability Blog, regarding best practices regarding mounting your framing to your foundation.
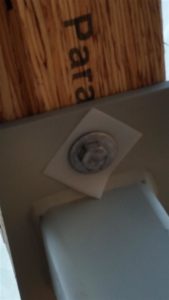
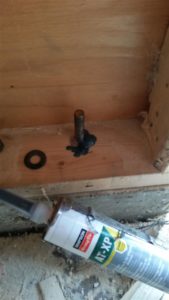
- As I wrote the above primer, it lead to a realization that something I had done last May to make aligning the first floor walls on the concrete stub extending above the floor deck easier, was not best practice and would weaken the wall’s base plate. Regular readers may remember that I made the anchor bolt holes in my plates oblong to allow the wall plane to be adjusted inboard and outboard. Per Howard Cook’s article, any sloppiness in the anchor bolt hole can significantly reduce the strength of that attachment.
So I contacted Howard and received info on the repair procedure developed in California, which uses the structural epoxy used to anchor dowels and other hardware into drilled concrete holes. I picked up some AT-XP from Simpson and filled in all of the voids around the anchor bolts. I also took the opportunity to fill any abandoned holes through the plates and concrete where I had drilled into the concrete for a wedge anchor, but had hit rebar and had to try a new location. This stuff gets rock hard and I was glad I had the foresight to re-seat the washer and nut before letting the epoxy setup. The next day I re torqued all of the bolts to ensure a tight connection and can attest that this was WAY stronger than the wood itself.
This brings you up to speed. I planned on starting the plumbing in the basement next week while I wait for the trusses to arrive, but as the sani-pump sump barrel is several weeks away and would be the starting point for the system, I will instead start work on the deck off the master bedroom. This will also help with installing the massive window coupled to french door off the master bedroom west wall.
Thanks for visiting!
“Strength does not come from physical capacity. It comes from an indomitable will.” —Mohandas Karamchand Gandhi (1869-1948) Indian Political And Spiritual Leader
“Do not follow where the path may lead. Go instead where there is no path and leave a trail.” —Muriel Strode Author
“A pessimist sees the difficulty in every opportunity; an optimist sees the opportunity in every difficulty.” —Sir Winston Churchill (1874-1965) British Statesman, Prime Minister, Author, Nobel Prize Winner
