Time to rise!
For those of you checking into the live video feed over the last day and a half, you will have seen that activity has once again finally commenced at the job site. Yesterday AM I wrapped up most of the AutoCAD design work. I still have the roof system to finalize and redraw and also things like ceiling joist layout. But the basic structure, plumbing runs, and HRV duct runs have all been planned and plotted.
It was 2 years since I was last immersed into the 3D and 2D model of the house and I had forgotten how difficult it was to keep it all in my head. This is an especially challenging design because while I am trying to keep every thing nice and compact, I still need to meet the design criteria of SaferHomes. For the purposes of framing, this means a min of 42″ wide stairs, 40″ for hallways, and 36″ door slabs. Add into the mix the need to comply with the BC Building Code seismic lateral bracing and the Part C of the Engineering Guide to Wood Frame Construction the District forced me to design to, and you have a lot of competing needs that are difficult to achieve in a compact design.
I started the final design work on April 20 and have put in 120 hours up to yesterday AM. By the way, I have over 3200 hours on the project to date counting some of the demolition time 2 years ago (had not started my time-sheet right at the beginning of project). This also does not count any of the design work I did prior to May 2014. I estimate an additional 3000 hours on the initial design was invested between 2012 to spring 2014.
When I started again on the 20th, I thought things were going pretty well for the first couple of days, but then got to the second floor of the model and realized it was a mess. We had decided to reorganize the master bath so that we could have a double vanity. This involved moving the vanity, tub and shower. This then involved switching the two windows around and this opened up a can of worms. This effected the braced wall panels, percentage of wall that was solid, window lintel sizes (one now bears the load from a beam going clear across the top floor to hold up the middle of the roof). This then effected how these loads were transferred through the first storey and required a shift of windows which again effected the braced wall beams and percentage of wall that was braced. All in all, I had to update 5 drawings to send to the engineer so she can resize the lintels and lintel posts (hope to have this back from her by end of week).
Then I had to reroute the plumbing design to pick up the reconfigured bath. This of course resulted in interference’s with the HRV runs. So I was pretty much redesigning 50% of the runs for both of these systems. I had most of this behind me when I started planning the first storey framing. I was drawing up the interface with second floor and with roofs and such. I was noting my jack stud heights and lintel length to make framing faster. I also needed to finalize the stair layout.
This is where things went sideways big time. In order to not waste materials, we decided to lower our main floor ceiling a couple of inches. This will let me use a full 8′ stud. By the time I add in the three plates and rest the assembly on the 6″ concrete curb, I end up with 8′ 10.5″ from the surface of the plywood to underside of floor truss. But because I was lowering the ceiling by 2″, my stair rise obviously would change. It was during the redraw of the side view of the stairs that I realized there was a mistake in the model. I went back to a file that was over a year old, and the mistake was there as well. I did not have enough room for the run of the stairs. The beams framing in the second floor stair opening did not fit into the space I had allowed. They would have cut one of the hallways at the end of the opening in half preventing access to the TV room at the NW corner of the top floor. The issue was that I did not have enough head room going up the stairs. This of course was exasperated by the now lower ceiling on the first floor. I have no idea how the mistake was made and how long it was in the file, but I needed a solution. 12 hours later I had optimized the landing at the top of the stairs to eke out a few inches, and then made both the TV room and guest bedroom a bit smaller so that the hall could be moved further north so that the stair opening could then be lengthened. But of course this effected, you guessed it, the internal braced wall panels. So again, these drawings had to be updated because now it also changed the width of the braced wall bands and the need to recalculate several of the wall percentages as a result. Fortunately I have a very high percentage of braced wall panels on most walls and had no problems.
This then led to more edits of the plumbing and HRV ducting as the moved walls contained these systems. With this all behind me, and the ability to sleep through the night once again regained, I then worked on the final optimized stud layout so that I would generally meet the 16″ planned centres, would line up to plywood ends, would miss all the required plumbing and ducts, and would reduce to the point possible any thermal bridges (I am not utilizing a consistent 16″ OC, instead between each set of posts/lintel supports, I centre a series of 16″ spaced studs so that there is equal space on each side of the pack between one post and the other. This will ensure that there is not too many sticks in any one region and allow for a healthy bay of insulation beside each post/lintel support. Otherwise you could easy end up with bays that are 2″-6″ wide representing a significant thermal bridge) .
This then led me to discovery of my next big blunder. I was ending up with a very small door into the main floor bathroom. I think that this mistake had also been in the model for a very long time. The door was drawn large enough, the issue was that the wall beside it did not meet the min size for a braced wall panel (34.25″ based on trade off method). I was checking the panel lengths as I went through and set the stud locations. This one was going to be harder to solve. My house has very tight tolerances in the east to west orthogonal direction. There was just enough room for a bathroom with 5′ tub, SaferHomes stairway & hallway, and then the kitchen based on the planned cabinet layout. The other issue was that I generally could not shift all the assemblies to the west (by making Kitchen smaller), because the basement if obviously already in place with specific point load transfers present. So to move the whole assembly to the west would entail a new beam in the basement and probably the need for some additional footings. I only needed about 6″ so fortunately I had elected a 42″ hallway which I was able to shave down to the required 40″. For the final 4″, I was able to move the wall between the garage and house further to the east. Instead of the wall resting along the side of the garage slab, it will now rest on top of it right along the edge. The only pain with this is that I will need to cut off the previously installed anchor bolts and instead use hilti wedge anchors. Crisis averted – Whew!
Of course in a ‘NORMAL’ home, there would be lots of room and the carpenters would just move walls where saw fit. This could of course result in the size of rooms being effected to the point that the room use is jeopardized (say a bedroom can no longer fit a king or queen bed, or a bathroom cannot fit a tub), but unless they are building for a client, they have no one to answer to. Things are a lot more difficult when you are building for yourself, and you have everything for a place and a place for everything.
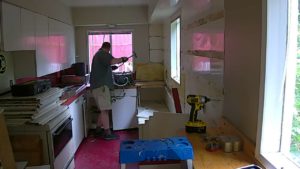
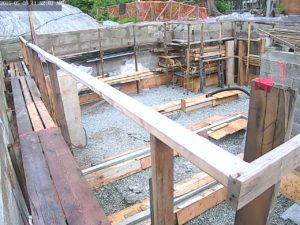
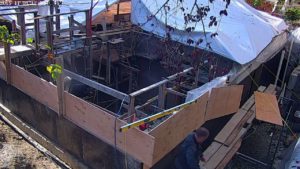
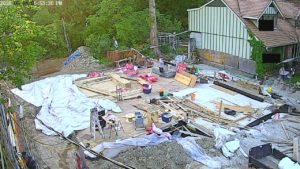
Anyway, it is behind me now for which I am very grateful. I have the new B.A.T. on site and have started cleaning off the deck to prepare for its magnificent raising. The deck should be clean by end of Friday and I will commence with the rigging of the tarp on Saturday. With all running smoothly, we should be able to finally start framing by the end of next week.

Thanks for visiting.
“You cannot get through a single day without having an impact on the world around you. What you do makes a difference, and you have to decide what kind of difference you want to make.” —Jane Goodall (born 1934) Primatologist, Ethologist, Anthropologist, Un Messenger Of Peace
“The best preparation for tomorrow is to do today’s work superbly well. ” —Sir William Osler (1849-1919) Canadian Physician, Founding Professor At Johns Hopkins Hospital
“By failing to prepare, you are preparing to fail.” —Benjamin Franklin (1706-1790) Politician, Writer, Scientist
“Courage is grace under pressure.” —Ernest Hemingway (1899-1961) Novelist, Nobel Prize Winner
